SpringBoot(一):项目构建

SpringBoot真的很好用!!!

在IDE中使用Spring Initializer快速构建Spring Boot项目

依次点击File,New,Project, 然后出现下面的界面。

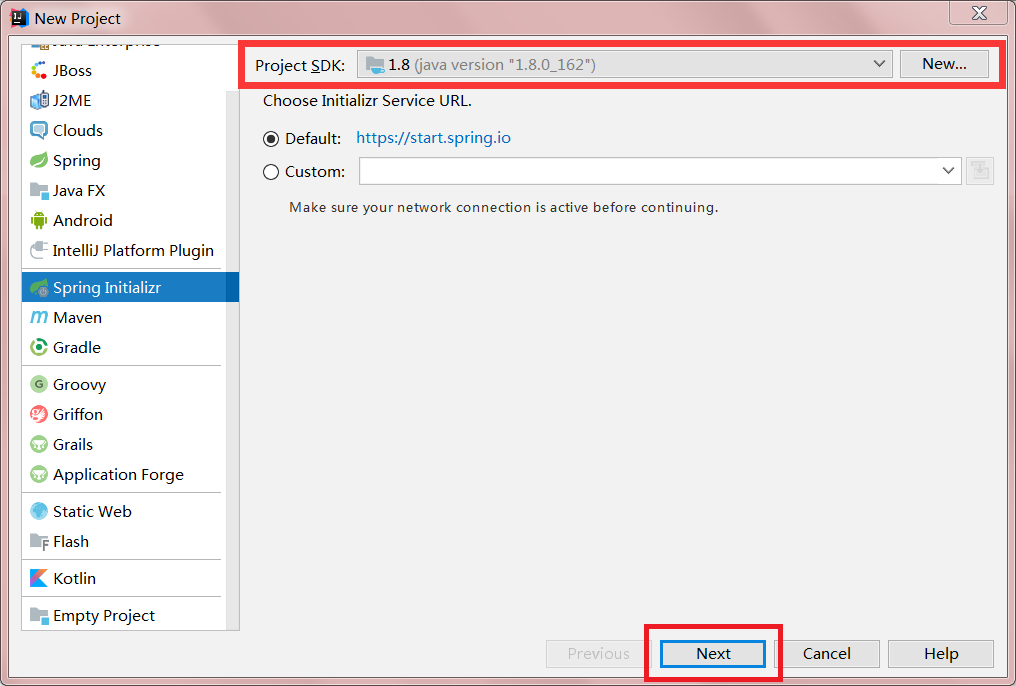
选择Spring Initializr,在Project SDK处选择JDK的版本,建议1.8及以上,当然1.7也可以使用,然后点击Next。
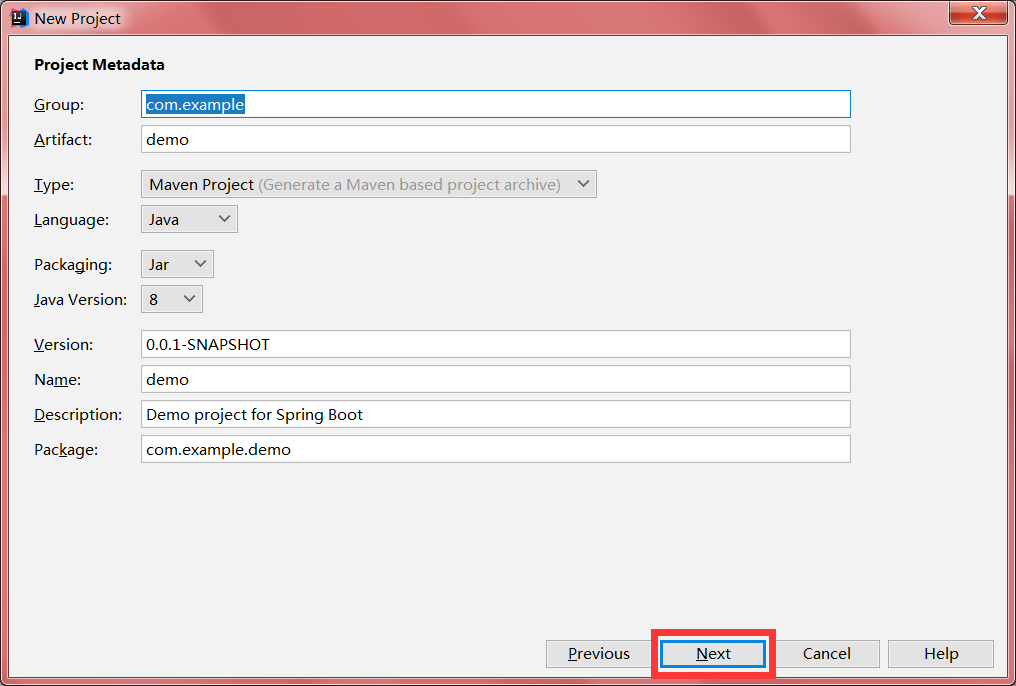
输入项目名称之后点击Next。

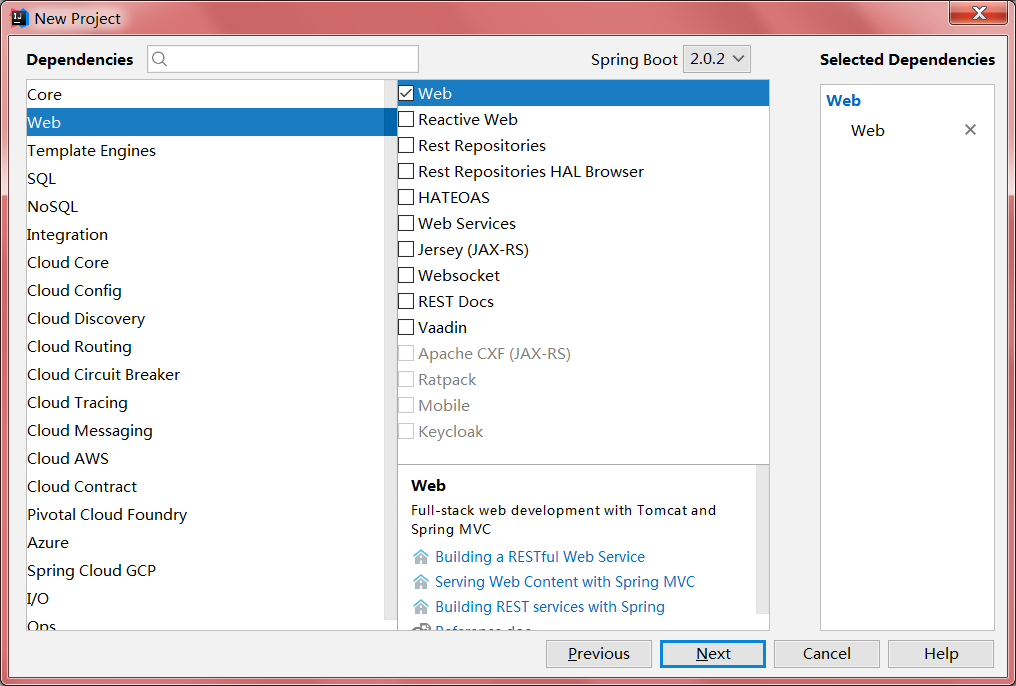
此处可以勾选所需要的一些组件,web按钮必须勾选,其它组件可以自由选择,例如Mysql,热部署之类的,在此处勾选之后,项目会自动下载相关的Jar包,当然也可以后期在pom.xml中自行添加。勾选之后点击Next。

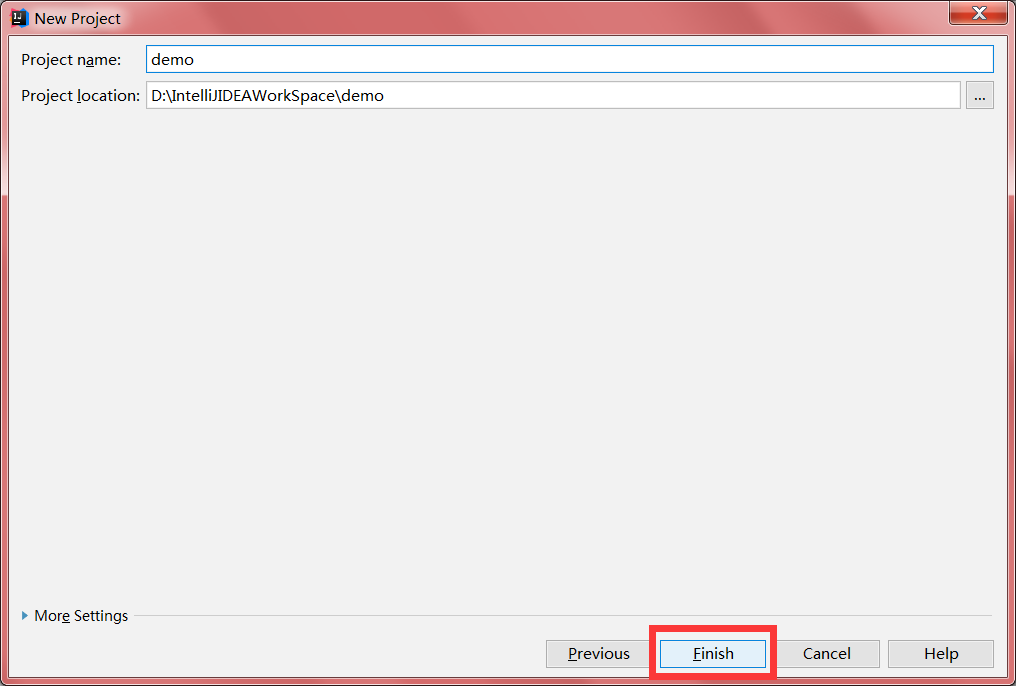
点击Finish完成,当新项目创建完成后,右下角可能会出现一个弹框,选择靠右那个选项,会自动下载jar包。

关于SpringBoot入口上常用的一些注解

  • @SpringBootApplication:这个注解所标明的类为SpringBoot程序的入口,通过运行这个类就可以启动SpringBoot应用(以下这些配置全是在@SpringBootApplication中引用的,对外暴露的注解其实只有@SpringBootApplication这个注解)。
  • @ComponentScan:开启组件扫描
  • @ServletComponentScan:这个注解可以扫描自定义的servlet,fileter和listener。在Spring Boot中这些东西都是需要单独进行注册的。但是如果加上这个注解可以省去这些步骤,它有一个属性value,可以指定扫描的包。
  • @EnableTransactionManagement:这个注解可以开启事务,在入口类上加上这个注解后,配合service层上的@Transactional 注解即可。
  • @MapperScan:这个注解可以将接口生成实现类,就是Mybatis的mapper代理形式,它也有一个属性value,可以指定扫描的的包。

关于SpringBoot的配置文件

配置文件的几种形式

SpringBoot中主要使用两种配置文件:属性文件以及yml文件(xml文件也可以使用)。

属性文件的使用方式和之前一样,采用key=value的形式。

然后在变量上使用@Value("${key}")

1
2
3
4
5
server.tomcat.uri-encoding=UTF-8
spring.http.encoding.charset=UTF-8
spring.http.encoding.enabled=true
spring.http.encoding.force=true
spring.messages.encoding=UTF-8

当属性文件中的配置内容有中文时,可能会出现乱码,我们可以先在配置文件里添加上面的代码,然后在IntelliJ IDEA中依次点击File -> Settings -> Editor -> File Encodings 将Properties Files (*.properties)下的Default encoding for properties files设置为UTF-8,将Transparent native-to-ascii conversion前的勾选上。

yml配置文件有固定的语法

  • 基本语法,key:(空格)value。yml中以空格的缩进来控制层级关系,左对齐的一列数据,都是同一个等级的。同时区分大小写

  • 值的写法

    • 普通值(数字,字符传,布尔):直接按照基本语法格式书写即可例如name: zhangsan,需要注意的是字符串不需要使用双引号或单引号,这两个符号有其它用法。

    • “”:被双引号括住的字符串,如果包含有特殊字符,字符会按照其表示的含义被识别,如name: zhangsan \n 666会被识别为name: zhangsan 换行 666

    • ‘’:被单引号括住的字符串,字符会被当做普通的字符串识别

    • 对象,Map

      1
      2
      3
      4
      5
      6
      people:
      name: 张三
      age: 20

      //或者可以使用单行写法
      people: {name: 张三,age: 20}
    • 数组(List,Set)

      1
      2
      3
      4
      5
      6
      7
      list:
      cat
      dog
      pig

      //单行写法
      list: [cat,dog,pig]

日志配置

如果我们在maven中添加了spring-boot-starter-logging依赖

1
2
3
4
<dependency>
<groupId>org.springframework.boot</groupId>
<artifactId>spring-boot-starter-logging</artifactId>
</dependency>

那么Spring Boot 将会自动使用logback作为日志框架,我们只需要创建一个logback-spring.xml配置文件即可。

1
2
3
4
5
6
7
8
9
10
11
12
13
14
15
16
17
18
19
20
21
22
23
24
25
26
27
28
29
30
31
32
33
34
35
36
37
38
39
40
41
42
43
44
45
46
47
48
49
50
51
52
53
54
55
56
57
58
59
60
61
62
63
64
65
66
67
68
69
70
71
72
73
74
75
76
77
78
79
80
81
82
83
84
85
86
87
88
89
90
91
92
93
94
<?xml version="1.0" encoding="UTF-8"?>
<configuration scan="true" scanPeriod="60 seconds" debug="false">
<contextName>logback</contextName>
<property name="log.path" value="./logs" />

<!-- 输出到控制台 -->
<appender name="STDOUT" class="ch.qos.logback.core.ConsoleAppender">
<encoder>
<pattern>%d{HH:mm:ss.SSS} %contextName [%thread] %highlight(%-5level) %logger{36} - %highlight%msg%n</pattern>
</encoder>
</appender>

<!-- 彩色日志格式 -->
<property name="log.pattern.color" value="${CONSOLE_LOG_PATTERN:-%clr(%d{yyyy-MM-dd HH:mm:ss.SSS}){faint} %clr(${LOG_LEVEL_PATTERN:-%5p}) %clr(${PID:- }){magenta} %clr(---){faint} %clr([%22.22t]){faint} %clr(%-40.40logger{39}){cyan} %clr(:){faint} %m%n${LOG_EXCEPTION_CONVERSION_WORD:-%wEx}}" />
<!-- 彩色日志依赖的渲染类 -->
<conversionRule conversionWord="clr" converterClass="org.springframework.boot.logging.logback.ColorConverter" />
<conversionRule conversionWord="wex" converterClass="org.springframework.boot.logging.logback.WhitespaceThrowableProxyConverter" />
<conversionRule conversionWord="wEx" converterClass="org.springframework.boot.logging.logback.ExtendedWhitespaceThrowableProxyConverter" />
<!-- 输出到控制台 -->
<appender name="STDOUT_COLOR" class="ch.qos.logback.core.ConsoleAppender">
<encoder>
<pattern>${log.pattern.color}</pattern>
</encoder>
</appender>

<!-- 错误日志 -->
<appender name="ERROR" class="ch.qos.logback.core.rolling.RollingFileAppender">
<rollingPolicy class="ch.qos.logback.core.rolling.TimeBasedRollingPolicy">
<!-- 按天生成文件 -->
<fileNamePattern>${log.path}/error/logback-error-%d{yyyy-MM-dd}.log</fileNamePattern>
<!-- 最多保存60天内的日志 -->
<maxHistory>60</maxHistory>
</rollingPolicy>
<encoder>
<pattern>%d{HH:mm:ss.SSS} %contextName [%thread] %-5level %logger{36} - %msg%n</pattern>
</encoder>
<!-- 只打印错误日志 -->
<filter class="ch.qos.logback.classic.filter.LevelFilter">
<level>ERROR</level>
<onMatch>ACCEPT</onMatch>
<onMismatch>DENY</onMismatch>
</filter>
</appender>

<!--访问日志-->
<appender name="ACCESS" class="ch.qos.logback.core.rolling.RollingFileAppender">
<rollingPolicy class="ch.qos.logback.core.rolling.TimeBasedRollingPolicy">
<!-- 按天生成文件 -->
<fileNamePattern>${log.path}/access/logback-access-%d{yyyy-MM-dd}.log</fileNamePattern>
<!-- 日志最大的历史 60天 -->
<maxHistory>60</maxHistory>
</rollingPolicy>
<encoder>
<pattern>%d{HH:mm:ss.SSS} %contextName [%thread] %-5level %logger{36} - %msg%n</pattern>
</encoder>
</appender>

<!-- info日志 -->
<appender name="INFO" class="ch.qos.logback.core.rolling.RollingFileAppender">
<rollingPolicy class="ch.qos.logback.core.rolling.TimeBasedRollingPolicy">
<!-- 按天生成 -->
<fileNamePattern>${log.path}/info/logback-info-%d{yyyy-MM-dd}.log</fileNamePattern>
<!-- 日志最大的历史 60天 -->
<maxHistory>60</maxHistory>
</rollingPolicy>
<encoder>
<pattern>%d{HH:mm:ss.SSS} %contextName [%thread] %-5level %logger{36} - %msg%n</pattern>
</encoder>
<!-- 只打印INFO日志 -->
<filter class="ch.qos.logback.classic.filter.LevelFilter">
<level>INFO</level>
<onMatch>ACCEPT</onMatch>
<onMismatch>DENY</onMismatch>
</filter>
</appender>


<!--日志打印的包的范围 -->
<logger name="com.zbrx.speed" additivity="false">
<level value="DEBUG" />
<appender-ref ref="STDOUT"/>
<appender-ref ref="ERROR"/>
<appender-ref ref="ACCESS"/>
<appender-ref ref="INFO" />
</logger>
<!-- mybatis输出sql -->
<logger name="com.zbrx.speed.dao" level="DEBUG"></logger>

<!-- 控制台打印日志 -->
<root level="INFO">
<appender-ref ref="STDOUT_COLOR" />
</root>

</configuration>

配置Durid连接池

在Spring Boot中配置Durid其实非常简单。

首先,我们要在pom文件中引入Durid的依赖,同时要确保自己已经添加了MySQL驱动包

1
2
3
4
5
<dependency>
<groupId>com.alibaba</groupId>
<artifactId>druid</artifactId>
<version>1.1.4</version>
</dependency>

然后在属性文件中配置相关参数

1
2
3
4
5
6
7
8
9
10
11
12
13
14
15
16
17
18
19
20
21
22
23
24
25
26
27
28
29
# 驱动配置信息
spring.datasource.type=com.alibaba.druid.pool.DruidDataSource
spring.datasource.url = jdbc:mysql://127.0.0.1:3306/mealsystem?useUnicode=true&characterEncoding=utf-8
spring.datasource.username = root
spring.datasource.password = 123456
spring.datasource.driverClassName = com.mysql.jdbc.Driver

#连接池配置
#详细信息,可查看文档 https://github.com/alibaba/druid/wiki/DruidDataSource%E9%85%8D%E7%BD%AE%E5%B1%9E%E6%80%A7%E5%88%97%E8%A1%A8
#初始化连接数量
spring.datasource.initialSize=5
#最大连接数
spring.datasource.maxActive=50
#最小空闲连接数
spring.datasource.minIdle=5
#配置获取连接等待超时的时间,毫秒
spring.datasource.maxWait=60000
#配置间隔多久才进行一次检测,检测需要关闭的空闲连接,单位是毫秒
spring.datasource.timeBetweenEvictionRunsMillis=60000
#配置一个连接在池中最小生存的时间,单位是毫秒
spring.datasource.minEvictableIdleTimeMillis=300000
#在将连接返回给调用者之前,验证从连接池取出的连接,查询必须是一个SQL SELECT并且必须返回至少一行记录
spring.datasource.validationQuery=select 1 from dual
#建议配置为true,不影响性能,并且保证安全性。申请连接的时候检测,如果空闲时间大于timeBetweenEvictionRunsMillis,执行validationQuery检测连接是否有效
spring.datasource.testWhileIdle=true
#检测validationQuery是否有效,做了这个配置会降低性能
spring.datasource.testOnBorrow=true
#归还连接时,检测validationQuery是否有效,做了这个配置会降低性能
spring.datasource.testOnReturn=false

最后创建一个配置类

1
2
3
4
5
6
7
8
9
10
11
12
13
14
15
16
17
18
19
20
21
22
23
24
25
26
27
28
29
30
31
32
33
34
35
36
37
38
39
40
41
42
43
44
45
46
47
48
49
50
51
52
53
54
55
56
57
58
59
60
61
62
63
64
65
66
67
68
69
70
71
72
73
74
75
76
77
78
79
80
81
82
83
84
85
86
87
88
89
90
91
@Configuration
public class DruidConfig {
private Logger logger = LoggerFactory.getLogger(DruidDBConfig.class);

@Value("${spring.datasource.url}")
private String dbUrl;

@Value("${spring.datasource.username}")
private String username;

@Value("${spring.datasource.password}")
private String password;

@Value("${spring.datasource.driverClassName}")
private String driverClassName;

@Value("${spring.datasource.initialSize}")
private int initialSize;

@Value("${spring.datasource.minIdle}")
private int minIdle;

@Value("${spring.datasource.maxActive}")
private int maxActive;

@Value("${spring.datasource.maxWait}")
private int maxWait;

@Value("${spring.datasource.timeBetweenEvictionRunsMillis}")
private int timeBetweenEvictionRunsMillis;

@Value("${spring.datasource.minEvictableIdleTimeMillis}")
private int minEvictableIdleTimeMillis;

@Value("${spring.datasource.validationQuery}")
private String validationQuery;

@Value("${spring.datasource.testWhileIdle}")
private boolean testWhileIdle;

@Value("${spring.datasource.testOnBorrow}")
private boolean testOnBorrow;

@Value("${spring.datasource.testOnReturn}")
private boolean testOnReturn;

@Value("${spring.datasource.poolPreparedStatements}")
private boolean poolPreparedStatements;

@Value("${spring.datasource.maxPoolPreparedStatementPerConnectionSize}")
private int maxPoolPreparedStatementPerConnectionSize;

@Value("${spring.datasource.filters}")
private String filters;

@Value("{spring.datasource.connectionProperties}")
private String connectionProperties;

@Bean //声明其为Bean实例
@Primary //在同样的DataSource中,首先使用被标注的DataSource
public DataSource dataSource(){
DruidDataSource datasource = new DruidDataSource();

datasource.setUrl(this.dbUrl);
datasource.setUsername(username);
datasource.setPassword(password);
datasource.setDriverClassName(driverClassName);

//configuration
datasource.setInitialSize(initialSize);
datasource.setMinIdle(minIdle);
datasource.setMaxActive(maxActive);
datasource.setMaxWait(maxWait);
datasource.setTimeBetweenEvictionRunsMillis(timeBetweenEvictionRunsMillis);
datasource.setMinEvictableIdleTimeMillis(minEvictableIdleTimeMillis);
datasource.setValidationQuery(validationQuery);
datasource.setTestWhileIdle(testWhileIdle);
datasource.setTestOnBorrow(testOnBorrow);
datasource.setTestOnReturn(testOnReturn);
datasource.setPoolPreparedStatements(poolPreparedStatements);
datasource.setMaxPoolPreparedStatementPerConnectionSize(maxPoolPreparedStatementPerConnectionSize);
try {
datasource.setFilters(filters);
} catch (SQLException e) {
logger.error("druid configuration initialization filter", e);
}
datasource.setConnectionProperties(connectionProperties);

return datasource;
}
}

DruidConfig类被@Configuration标注,将其声明为配置类;

DataSource对象被@Bean声明,为Spring容器所管理;

@Primary表示这里定义的DataSource将覆盖其他来源的DataSource。

关于静态资源的访问

有两种配置形式:

webjars的形式:可以通过Webjars生成一个jar包,然后在pom文件中引入,例如我们想要引入JQuery,可以先在Webjars的网站生成JQuery的jar包,导入之后就会在Libraries看到如下的依赖。

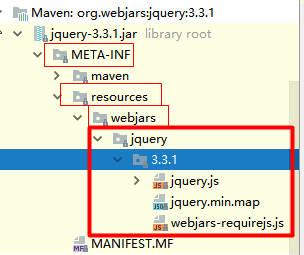
我们可以通过localhost:8080/webjars/jquery/3.3.1/jquery.js 访问到这个资源。

除此之外还有另一种形式:

我们可以将静态资源放到resources文件夹下static或者public文件中